A positive outcome and new skills!
There are not too many jobs on a boat that end up being easier or quicker than you initially estimate. In almost every case, it’s the exact opposite, and so it was with the project we’ve been working on for just over a week.
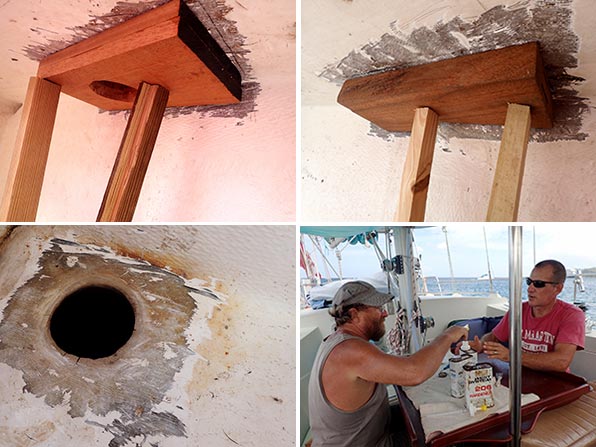
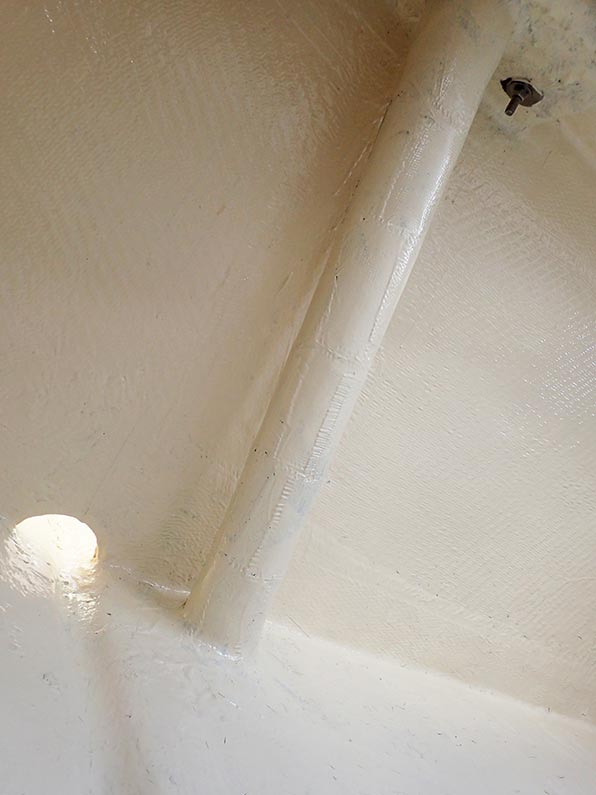
It all began with a bit of a rust stain on the exterior of our starboard bow. Inspecting the stain led us to the source, the old rusty hawsepipe in the starboard bow locker. The pipe, which the anchor chain passes through between the windlass and the chain locker, had pretty much reached the end of its lifespan. The exterior fiberglass was cracked in numerous places, and further inspection led me to find that the pipe that was inside it, made of iron I believe, was rusted and crumbling to pieces.

The old hawsepipe was the source of the rust on our hull.
Where as I had initially hoped that I could simply patch over the fiberglass, it now seemed obvious that the only proper way to fix it would be to cut the old pipe out and begin anew. Our friend Ken, who came over to offer his opinion on the job, assured me that he’d be available to help me through the steps. As the days went on, oh, how I bet he regretted that offer!
Of course, while we were at it, why not reinforce the anchor windlass to better deal with our new big Mantus anchor? It’s just a bit more work, right?
First using hammers, chisels and brute force, I removed as much of the old pipe as I could. Later, having borrowed Ken’s angle grinder, I was able to cut the remainder of the pipe and fiberglass out.
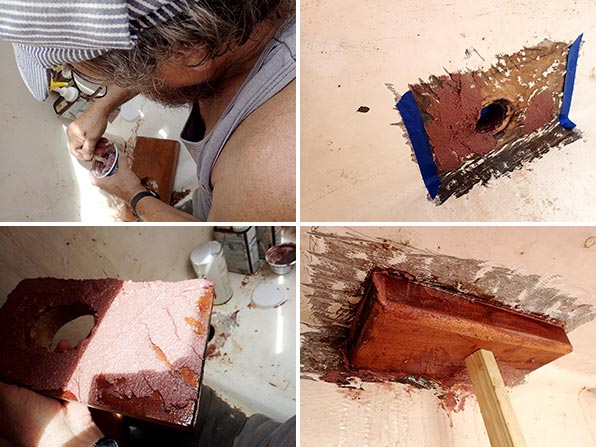
We puzzled over what to use to replace the old pipe. Stainless would be awesome but way too costly for such a job. I had read of one Amel owner who used PVC. As it turns out, some friends of friends had on hand a 3 foot length of 3″ diameter fiberglass tube that they no longer had a use for, perfect for our application! Huge thanks to s/v Virtue and Vice for passing that along to us!!!
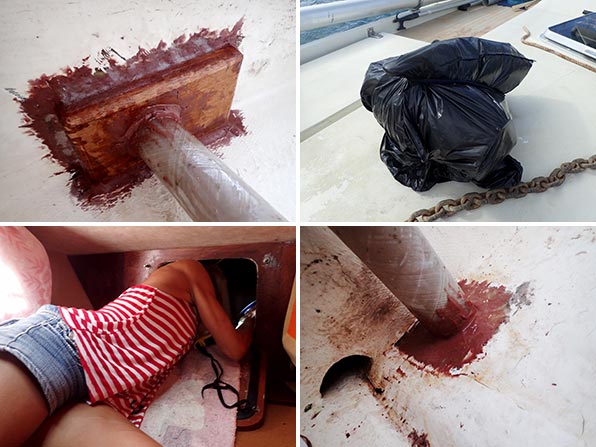
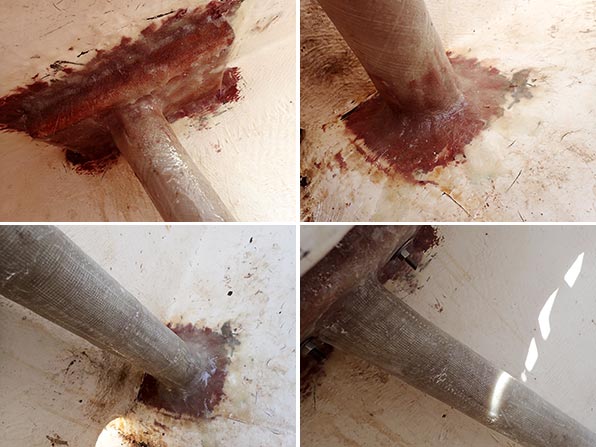
The photos below illustrate the steps that we went through. The mahogany backing blocks for the windlass, donated and shaped by Ken, were first attached to the top of the lockers using thickened epoxy. The pipe was cut to length and then also fastened in with epoxy, both from inside the locker, and from the underside, accessible from the chain locker. Later, the entire thing was glassed over. I also took the time to add a couple of extra layers of fiberglass cloth to the pipe, adding to its thickness to hopefully give it a few more years of wear.
On that note, will the pipe wear out? Undoubtedly. I’m confident it won’t happen quickly though, and when it does, it will be easy to repair. I’m pretty happy with how the job turned out, and even better, I learned a lot about this type of work from our friend. A positive outcome and some new skills… you can’t beat that.


Waiting for the paint to dry so that we can add a second coat.
Nice work and great advises! Always nice and informative following your adventures.
Thank you!
Looks a nice job. I bet it took more than a couple of hours!!!! 🙂
It must help to have a wife who can fold up like a paper clip to get into these places, – and then still smile about it! Quite amazing. I am very jealous.
Mike
She’ll go in lockers and go up the mast!
You guys are getting pretty handy. Planning to build your next boat yourselves?
Ha! Not likely. Our friend Ken could though.
Glad to of been a help Mike, you could have showered me with more beer, but you were on that month of abstinence I think. My bad luck! It’s all good though! Let that paint dry good before you fill those lockers. 🙂 🙂
That is seemingly going to take a while!
I see you have a Tigre windlass. Same as ours. I would recommend that you change the brushes, as a preventive maintenance thing. Ours were left too long in place and the repair guy said that the brushes became so short it started arcing and ate the contact area on the ‘big piece in the middle’ (He had a name for it that I can’t remember) The brushes are not too expensive and are fairly easy to replace, as long as you do not strip the screw that holds then, as I did for one of them. I bought the brushes online from Arrowhead Electric, reference L9.13.6H2 back shunted brush. $9.50 each (bought 6 even though there are only 4 on the motor)
Thank you, Denis! Have you ever heard me say “If it ain’t broken, don’t $#%^ with it?”
I once screwed up a windlass royally trying to change the brushes.
Here’s a question for you: Did you change the oil in yours?
I tried ordering the L9.13.6H2 brushes that Denis suggested. Once they arrived I realized that either Arrowhead shipped me the wrong brushes or that model isn’t what we need. My Tigres needs a 16mm wide brush instead of a 13mm wide and the ones that they sent me are side shunted single lead whereas mine are back shunted double lead. I sent them an email, we’ll see what happens. Luckily we’re in a marina until spring so I don’t really have a need to use the anchor. 🙂
I’m not actually sure the exact model of windlass that I have.
Nice. And a few random FRP tips, not in the books (or not explained), that you might use someday:
1. Just as a welder will tack something in place with a few spots before running a seam, a few spots of thickened 5-minute epoxy (use the same thickener) can quickly set and hold something in place while you lay on the cloth and so forth. Another trick to avoid big bracing boards is to hide 1-2 screws.; they aren’t structural, they just hold stuff in place.
2. Glass cloth bends into corners better if you cut pieces on the bias. Same with biax. Looks messy at first, but it works. Tape is shit in tight corners.
3. Mat does not work with epoxy (only polyester–the glue does not dissolve in epoxy). Use 17oz. biaxial cloth instead.
4. Always fillet corners before glassing. Glass is weak in sharp corners, but more to the point, it won’t flow into the corners anyway. The smoother the fillets the better.
5. If you need to slow the epoxy down for work time, keep it on ice until you mix it. It will warm up and work fine as soon as it hits the surface, but the cup won’t go off so fast. For sure, keep the part a and part b out of the sun.
Thanks Drew. Good tips. Following Ken’s instructions, I did fillet the corners as best I could, and it made a difference.
Did the surveyor miss that or was it an expected future repair?
He missed many things but that one, he did not. The other Maramu we looked at in PR had the exact same issue, only worse.