Our daily knots
With so many control lines (ropes) on a sail boat, the art of knot tying and sailing definitely go hand in hand. Others agree of course which is evidenced by the number of books that have been written on the subject. Many of these books are so detailed and show so many knots though that it may be difficult for a novice to know which ones he/she should focus on learning first. The following 7 knots are ones that Rebecca and I use on ZTC each and every day so I humbly suggest that these could form the basic curriculum for a knot-tying newbie.
What follows below are simply my comments on the knots, not instruction in tying them. In my opinion, a great website for learning to tie them is Animated Knots by Grog. If you don’t already know these, grab a couple pieces of line and then go to that website and practice.
The Bowline
This, I think, is the grand-daddy of all nautical knots. Many people are familiar with the mnemonic “the rabbit comes out of the hole, around the tree and then back down the hole” which forms the basic knot structure. We first learned how to tie the knot by itself and then following that, tie it around an object which is probably even more important. Once this can be easily done, there are other variations that you may like to try your hand at.
The Clove Hitch
Interestingly, the website I linked to above says not to use this knot because it can slip and/or bind. We do however use this knot frequently but not where high security is required. You can often see it used to tie fenders to lifelines or rails because it is very easy to adjust the height of the fenders as you are approaching the dock. A more secure variation of this knot that I also like is the Constrictor Hitch which I have written about in the past.
The Round Turn and Two Half Hitches
This is another knot which you will see used to tie fenders to rails. It is more secure than the Clove Hitch but much more difficult to adjust once it has been tied. We use it in many applications though and I’m sure you will too.
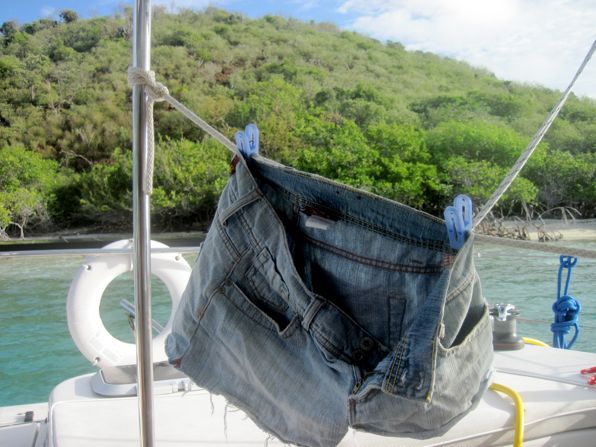
The clothesline is tied to the rail via a round turn and two half hitches. In this case, Rebecca added an additional turn around the pole (3 instead of two) before locking it with the half hitches.
The Reef Knot
“Right over left, left over right” forms the Reef, or Square Knot. We use a Reef Knot when tying a line around an object where high security is not a priority. It is easily untied which is both a benefit and its downfall. NEVER use this knot to join two lines together (what is a called a Bend).
The Rolling Hitch
When a line is tied to another via a rolling hitch, it can grip it securely (if the pull is parallel to the original line). We use this every day to attach our bridle to our anchor rode. We also use it to secure our jib halyard and topping lift so that we can ease them and open the hatches to our salon. There are numerous variations of “slide and grip” knots including the Prusik Knots which we use to climb our mast.
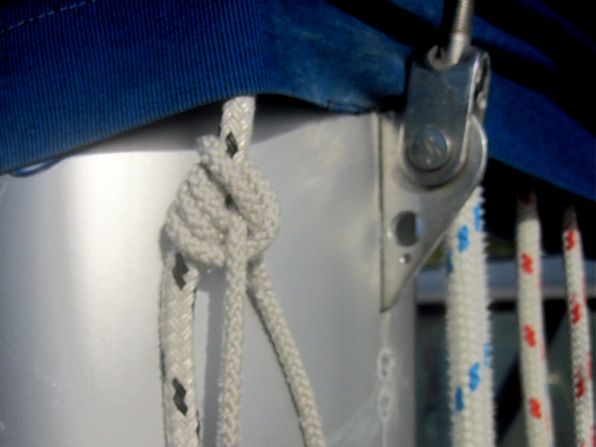
The weight of the boom is taken up by the rolling hitch so that the topping lift can be eased. In this case an additional turn was again added to the rolling hitch to increase its effect.
The Cleat Hitch
Each time you secure a line to a cleat you will use a cleat hitch. It is surprising to me how many people do this incorrectly. If you’re at all like us, you’ll probably find that when you first learn this you’ll be able to tie it with ease in one direction but it will cause you fits to tie it in a different orientation. If you refer to the instruction on Grog’s website, we always use the locking hitch that he mentions.

Our anchor bridle “made fast” to the bow cleat.
Coiling a Line
I’m not sure this is what you would call a knot but you’ll again, be using this every day on a boat. Coiling lines properly keeps them neat and allows them to be quickly deployed when needed.

A dock line, properly coiled and then secured to the lifeline via a clove hitch.
EDIT: We no longer coil lines. Instead, we do this.

To just throw in my $0.02 on the subject. In rock climbing we use the clove hitch all the time when someone wants to tie off to an anchor and you need a simple and secure knot. In the climbing world there seems to be a pretty large body of evidence that under loads right up until breaking it doesn’t slip.
Either way, like you said there are hundreds of knots that someone could learn and use, so if one works for you and it’s safe then it just comes down to personal preference. So like I said I thought I’d just throw my opinion out there on the subject.
We had to use most of those knots every day as a fire fighter. to lash a branch or HP hose as an extra man until help came. I am shire you would of done the same Mike ?
[…] Cleat HitchThe Coiling LineRead about the other knots and see some more pictures over at the Zero To Cruising article.Zero To CruisingSailrocket 2 Hits 20 Knots in Test RunVideo: Kitesurfer Sets New World Record for […]
Techically with the cleat hitch you should go around the base of the horn a couple of times before you lock it on the horns. The way shown, the load line could come off over the top of the horns if slackened and come undone. Plus as shown the load is transmitted to the lock knot which tightens the lock and makes it hard to undo. If the line is passed around the horn base twice the load is taken up mainly in friction around the base and the locked area will not tighten, so its easier to undo. Cheers Peter S
Interesting Peter. I have heard others say specifically not to do that as under great load, those turns can jam. Are you referring to how I show it in the pic or how it is shown on Animated Knots?
For large diameter line (like jib sheets) coiling the line in a O actually puts one twist in the line for every loop of the O. It is better to coil the line in an 8. This removes all the twists. I use a single, continuous sheet and removing the twists is important.
I agree Andrew. I am a little lazy about that.
Hey Andrew. I just visited your site and downloaded your free book. Thank you. I look forward to reading it.
I’ve never been taught or taken the time to learn a proper set of knots. I am making this one of the things I can do while I’m still land locked! Thanks for the references.
Perfect time to practice. We made a game of it between the two of us, challenging the other to tie a particular knot within a certain amount of time.
Mike, with regard to the cleat hitch, you are absolutely correct. Peter, the purpose is to tie a knot that can be released UNDER LOAD. Correctly done, the line goes under each horn of the cleat, once, then up and over in the figure eights. If you put more turns around the cleat base, the line will jam under severe loads and your only solution is to cut the line. ONE TURN ONLY! Mike, sometimes it is better to put many figure eights, rather than the locking hitch. This would be when the line is either really big, or, more often, when you foresee easing the line without actually removing it. When you need to ease, just start removing the eights until the line starts to run, and you keep control of it. Sort of like removing the wraps on a winch, until the line runs, so you can ease and control at the same time.