Editing underwater pics for Dummies
When I spoke with my friend Steve the other day, he told me that he believes that everyone wants to go home from their vacation with a story to tell. I definitely agree. For many, that story is easiest to tell when illustrated and given that everyone has at least one or two devices capable of capturing digital images these days, that task is infinitely easier than it was 20 or even 10 years ago. I think that some people though, when comparing the photos they capture to others that they see in magazines or even on the web, end up disappointed with their results. It doesn’t need to be that way.
I posted some info on basic photo editing for bloggers once and even wrote about the two different cameras that we use, both of which are waterproof. As a follow up to yesterday’s post of snorkeling images, here are some extremely basic tips on how to make your underwater shots look a whole lot better. Before you comment, yes, I know that Photoshop wizards can do a hundred other things to improve on the following suggestions (sharpening, curves, filters, etc.). I typically do one or two of those things myself. This post is aimed at those people who are not yet in the wizard category though. Give it a try and let me know if you’re happy with the results.
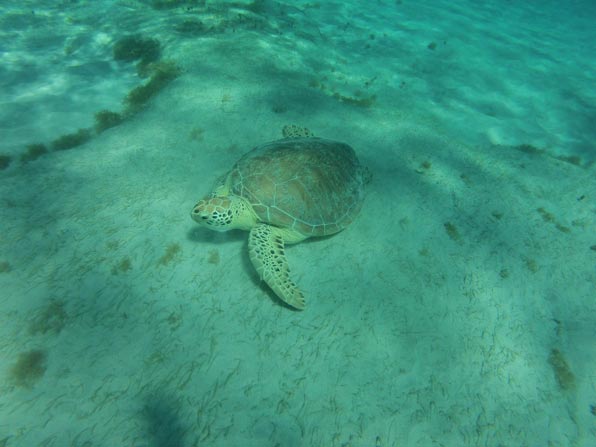
Original pic. It’s not too bad but it could look a lot better.
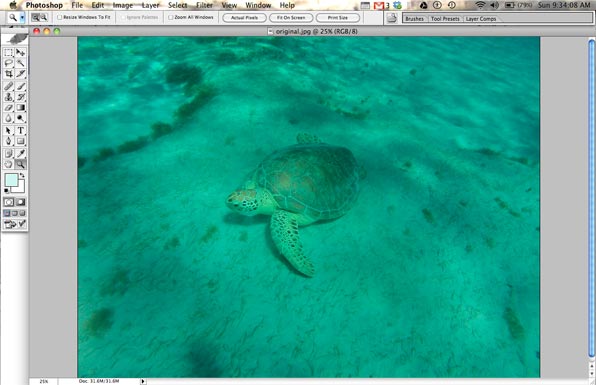
Open image in your favorite image editing program. I am using Photoshop CS.
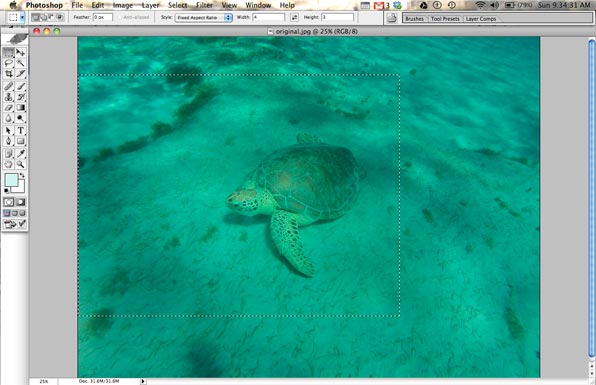
Select the most important portion of the image. Consider the Rule of Thirds.

CROP image.

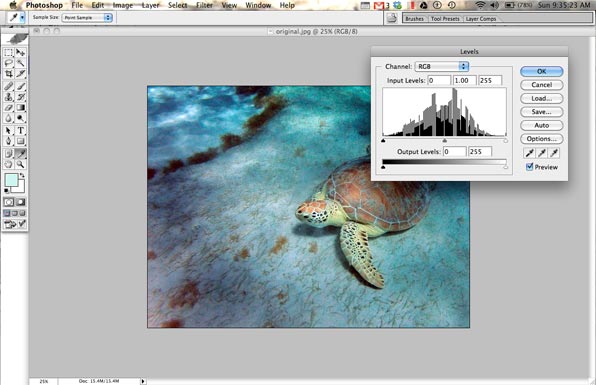
Open LEVELS adjustment window.

Select AUTO.
Voila! Almost always the edited underwater image will look dramatically better than the original.

You’re not done yet. Next you need to adjust the IMAGE SIZE.
Please don’t try to post a pic that is a bazillion pixels wide!

Select SAVE FOR WEB. Choose a new name or destination so that you don’t overwrite the original.

I typically save my web images as a .JPG with 50% quality for our blog or 80% for our Facebook page.

The finished product (50% quality). Much better, wouldn’t you agree?
Great Tip Mike…….What a difference.
Thanks, John. It is very easy and makes a huge difference in most cases.
Awesome. And on top of that, all you really need is Adobe Photoshop Elements. It has all the same “Auto” buttons and can cost as little as $65US. You can get it from Amazon AND help out ZTC a little by using the amazon link on over to the right! It truly works as easy as Mike has shown.
🙂
Adobe released the CS version of photoshop, illustrator and indesign for free. Works best to download each one separate instead of the suite.
https://docs.google.com/document/d/1woD1x4CzokSxRsTaNU4K0nH7n0GAUSkXmwyfWAjLXu0/preview?pli=1&sle=true
Free? You can’t beat that.
Brilliant!
Thanks for the tip!
You’re welcome.
Your effort shows. I generally edit photos–web pages open faster and there is always room for improvement–but occasionally I’m lazy.
I use Irfan View, freeware that a PC wizard introduced me to. Not as capable as some software, but it does all I ask and is not resource greedy. http://www.irfanview.com/
Good to know. I do everything on a Mac.
I agree it produces a better picture in itself.
However, it is a long way from what you actually saw. So if you want to keep pictures of your holiday, you may be better off leaving them alone and retaining their authenticity. IMHO
But, if you are going to publish them, as you do, then I can see why you do it so as to make them look like magazine pics for the benefit of those who expect that.
It is interesting though, so thank-you.
Mike
Your visual cortex behaves quite differently than the camera’s sensor and software, and the camera makes a lot of assumptions in its processing that are only valid for certain common lighting situations. There is no absolute “what you saw”!
Almost every image you get from a professional photographer has had the colour balance and the tone curve tuned to better reflect the photographer’s idea of what the camera should have captured. If you’re shooting underwater, the colour of the ambient light will be skewed far beyond what the camera’s automated algorithms like to assume. The processing Mike described (or the more accurate and tedious level/curve tweaking) is intended to cancel out the colour skew that the camera introduced when it was used in non-standard light, and- if done properly- the end result is roughly what you would have actually seen had you been there long enough for your eyes to adapt to that light.
FYI, if you take a lot of images, a professional photo workflow system such as Lightroom (Win/Mac), Aperture (Mac) or Darktable (Linux) is very much worth it. Cropping, colour balance, sharpening, curve tweaks, noise suppression, overlays, exporting and virtually all other common functions are all right there, all with batch modes, and with a very easy learning curve. Since switching to Lightroom, I think my time spent on post-processing has been cut drastically- getting great results out of 100 frames in Lightroom is faster than getting OK results out of 8 or 10 frames in Photoshop. These days, I only drop into GIMP/Photoshop for masking and compositing.
Excellent post Mike. My underwater photos (up until now) have always looked like the first one you showed. I’m now going after Photoshop CS for Mac…..
Good luck, Wade.
My problem is sheer laziness.
I remember my parents had books and drawers full of pictures.
Nowadays, they’re all on our phones and disappear with each upgrade….I’m heading to Walgreen’s to print some of these out soon!
It does take a bit of time but the results are worth it IMO.
Thanks guys
De nada. 🙂
What an excellent tutorial!! I am off to try it out on some underwater pics I took when I was last in the BVI.
🙂
Post back here and let me know how your pics turn out.
They didn’t! When I upgraded to Lion I lost CS2 and I forgot that so when I just tried to download it again from that link above, it didn’t work. 🙁
I need a newer version.
Virtually any image editing program can adjust levels. Even iPhoto can do it to a degree.
Thanks Mike….great tip, we tried a few photos in Aperture….wow what a difference. Cheers.
Cool! 🙂
But you need a good picture to edit though 😉
That’s a given. Keep finger out from in front of the lens…
That’s an excellent tip.
Do you have any ideas for doing similar adjustments on video?
Although I set my camera to the ‘underwater’ video profile, which applies a slight warmish filter, it still results in underwater videos that are too blue and lack contrast.
iMovie (Mac) allows you to adjust levels on video.
Thanks, I’ll give it a try!
You’re welcome. Let me know how it works for you.
[…] http://www.zerotocruising.com/editing-underwater-pics-for-dummies/ […]
Thanks! You just saved me from deleting my underwater shots! I was thinking I needed a color filter In order to see the true colors. I use a go pro.
🙂
What a great easy way to clean up my underwater shots. Thank you.
For what’s its worth, I was also told that you should use a red filter underwater. I know they make adapters for GoPro that give you a red filter.
I think that works but my guess is that you’d still end up having to do some processing of the images to make them look their best.