Cracking up
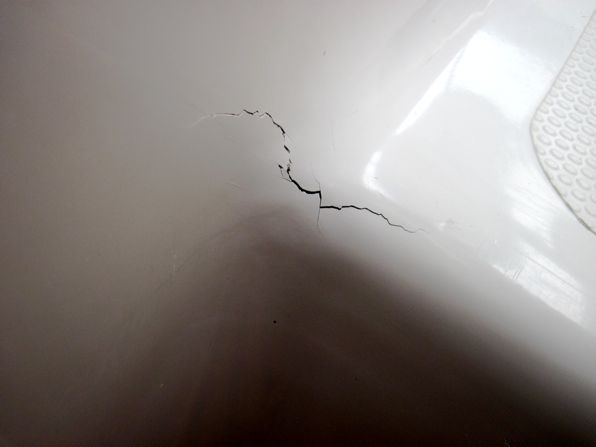
Would a crack like the one shown in the first photo below concern you? It did us and so we set about trying to repair it, as much as our limited repair skills would allow. The crack existed just at the top of the stairs leading down into our starboard hull. The cause of the crack is uncertain but thinking that perhaps it was due to having our shrouds too tight, I have since backed them off a couple of turns.
Fortunately I had relatively easy access to the underside of the crack, the area directly below it being inside our main electrical cabinet. My procedure for repairing the crack was as follows:
- Slacken the wires running immediately underneath it. This in itself was the most time consuming part of the exercise as the wires were quite taut. For some reason, I put all my efforts into getting the slack from one end of the wires. It wasn’t until I realized that I could free up slack in either end to get the result I wanted that I got anywhere.
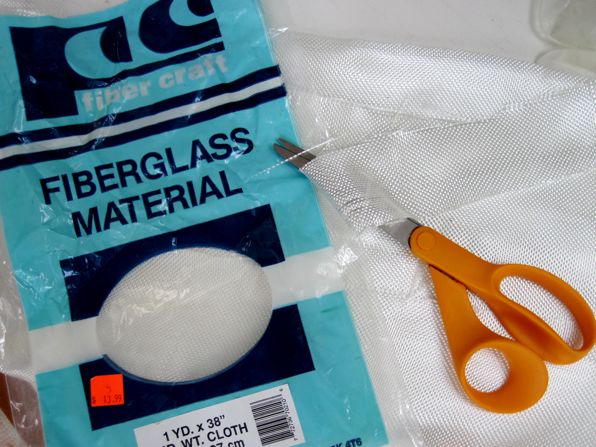
- I cut several pieces of fiberglass cloth to reinforce the underside of the cracked deck.
- Using West Systems epoxy, I wetted out the cloth and applied it to the underside of the deck. I allowed the first application to dry before applying a second group of cloth strips/epoxy.
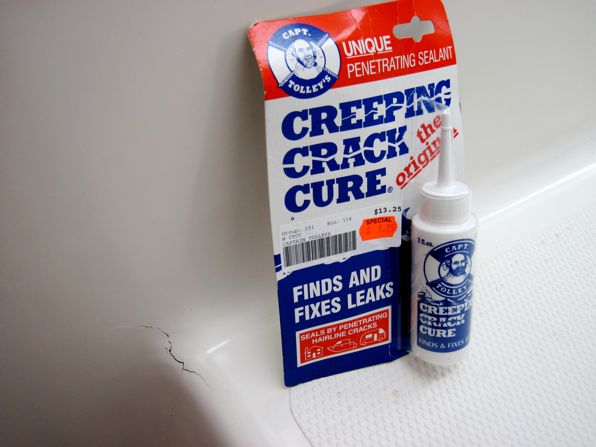
- Once the underside was reinforced and the crack sealed from below, I filled in the gap on the deck with a product called Capt. Tolley’s Creeping Crack Cure. I purchased this stuff some time ago with the intent of applying it to some gelcoat cracks in our bimini. I have yet to tackle that job so this was my first experience with the product. I’ll let you know how it turns out.


Well, from reading the two previous entries, it seems you are having WAAAYYY too much fun. 🙂 So, into every cruise, a little crack must fall, and not the kind that’s smoked! Yeah, a crack like that would bother me. I’d want to know what caused it. But, it sounds as though you were able to make a proper repair without too much trouble. Now, onward and upward. Or sideways, if you prefer! I’ve just been rereading Tony and Sue Smith’s blog. He’s the one who designed the Gemini and started the company, Performance Cruising, which makes it. Interesting, but not near as much fun to read as your blog. Not as informative, either.
Creeping Crack Cure works quite well. Keep applying it until it stops disappearing. The capillary action works and it travels deep into the crevices.
I question whether that crack was due to overtensioning the shrouds. But impossible to draw any real conclusions from the photos. I would check it out further. Obviously this is a flex point. It could be related to how the boat was lifted in and out of the water. Could be that structural support elsewhere in the boat is compromised. Check to see that all of your bulkhead tabbing is still intact.
That’s a really nasty crack… no wonder you were concerned! Please show us how it looks when it’s all repaired?
If I recall the PDQ 32 layout correctly, the bulkhead in those photos is the same one that’s responsible for transferring loads between the mast step, the hulls and the chainplates. So yes, I would be worried about the crack. And I’d likely solve it the same way you did, with epoxy and cloth, feathering out the fibreglass out six or eight inches on each side of the crack.
My guess would be the culprit is a small void or other minor layup error dating back to when the boat was built. Over time, as the boat flexes and high loads cycle this way and that, the laminate slowly fatigues until it eventually gives way. Stair treads are notorious for this; they’re hard to lay up well and often flex quite a bit when you step on them. I’ve had similar failures happen in all sorts of parts (prepreg carbon is especially bad for small voids, especially with tired workers) and, as far as I can tell, the only way to prevent them is to spend quite a lot more time (thus money) making the thing in the first place- extra fibre along the load paths in high-stress areas, etc.
I very much doubt your shroud pre-tensioning is to blame. Unless you really whaled on those turnbuckles (as in, “I think I’m bending the mast” tight), the pre-tensioning on a boat like yours will be pretty small compared to the shroud loads created by the mainsail and jib. But sailing loads would probably enlarge this crack, had you not patched it, so it’s a good thing it’s fixed!
ewww, that crack looks nasty.
Your repair sounds OK except one thing, if I may be so bold to point out. When using West System Epoxy you should be sure to remove the amines from the surface of the epoxy after it cures between coats. This is a waxy coating that remains on the surface of the set epoxy. You can sand it off and see without a doubt how it clogs the sandpaper or you can simply take a 3M scratch pad or anything similar and scrub it off with water.
Any chance it was the slamming on the sand that made the crack? Definitely let us know how the creeping crack repair goes because I have some very small surface gelcoat cracks I’d like to repair for the aesthetics.
Deb
S/V Nomad
http://www.theretirementproject.blogspot.com
hey Mike, having wooden boats we are no strangers to the creeping crack cure, but that stuff is basically a high viscosity caulk and is used primarily to fix those unfixable leaks around windows etc. The best way to fix gel coat cracks is with gel coat (2 part epoxy, applied and buffed when cured) I’d recommend using the West System silica ( mixed with the epoxy) for large cracks and their 410 filler for finer filling that needs to be sanded later, followed by matching gel coat on top of that. If you look up Jamestown Distributors (one of the best boat supply places in my opinion) they have videos on how to use all these products for the best results.
Always a few thoughts….
* When you eased the shrouds, did the crack close up? It seems to me that that would be in compression, but given the way the liner fits, who can say.
* That FRP inside the cabinet (back side) seems to be painted with latex. You MUST get the paint off. I will cost you most of your bond reliability.
* Never used Tolley’s, so can’t say. I think the West System is going to be stronger. However, I would not expect to get any strength in the crack itself; I would depend completely on the FRP on the back side. I would be laying up at least 6 layers over an area at least as big as my hand. It’s very lucky that it is in an easy spot to reach that is hidden.
I wonder if it was not really rigging stress related. Perhaps there was a stupid spot in the layup, where the fibers didn’t really reach around the corner properly, and that the stress of the liner against the hull found the weak spot over time. It needs fixed so that it does not spread, but I think it is more cosmetic than structural. I simply can’t see the rig putting pressure on that in that dirrection.
I think the crack was caused from excessive exercising, I’d crack under that much energy.
Capt Tolleys is basically a weak and runny silicone and will find its way into the strands of the fibreglass construction, so when you come to inpregnate the fibreglass with resun to effect a propper repair the silicone already in there will not allow it so it has to be ground out and cleaned off! Tolleys is more suited for window leaks to glass , rubber and aluminium, rather than GRP in my opinion! ( stick a piece of gaffer tape over the crack as a ttemporary repair) For me I would need to find out why the crack? and then reinforce the hull construction so it doesn`t happen again and repair it using same materials! I hay have missed something so bear with me please! :o))
I agree with Jennifer – too much exercising!
Thanks for the info and advice everyone. I don’t think it’s super serious but I did want to stop it from spreading. I’ll see how it goes. I am still very much a newbie at the whole fiberglass-repair thing.