A day without a repair job is like a day without…
A day without a repair job is like a day without… being on a boat?
Yesterday’s task was to patch a leak in our dinghy. When it comes to this particular repair, I guess we’ve been pretty fortunate to have escaped having to do it for this long, especially considering we purchased our current dinghy used and were told at the time that it was 5-6 years old.
We hear of people complaining about their leaky dinghies all the time. In fact, we SEE people with leaky dinghies all the time. We know it happens and have planned for this eventuality. Finally, we got to join in the fun.
Way back in our research phase I copied and saved the following info on how to patch an inflatable. It’s source is the book How to make money with boats by Scott Fratcher. I am posting it here with his permission. The info is excellent and we followed much of it when completing our repair. Hope you find it helpful because we sure did. Now I think I should check out the rest of the book!
Inflatable dinghy repair is a great business that everyone needs. Inflatable dinghies are the norm in the yachting world. Most of the high quality maypops (may-pop at any time, remember that every time you get in one) are made from Hypalon. The lesser quality ones are made from PVC or some combination. All you need to do is learn two fabrics and how to lay a nice patch, fix a seam, and make a transom upgrade. After that you’re on your way to earning 20-30 dollars per patch. Most every yacht has one of these $4000 dollar bags of air that is in constant use and abuse.
Carry a few big pieces of Hypalon and PVC patch material. You will also need some TipTop SG3000, Bostic, or other high quality two-part glue.
Tip: Hypalon fabric is not cheap, but is around cheap when people finally discard an old worn out dinghy. The old fabric normally has good areas left that can be salvaged for patch material.
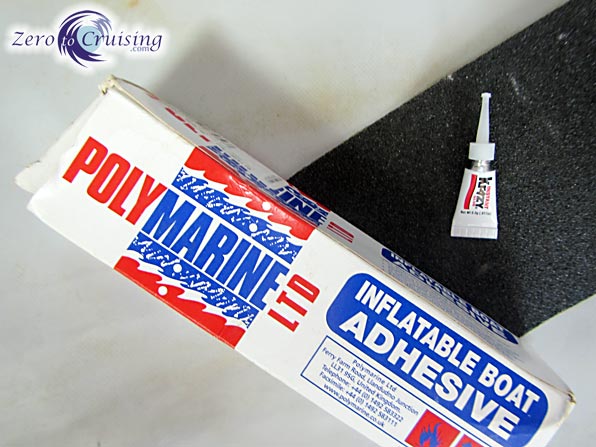
Note that because we have had this info for some time, we already had some Hypalon glue on board and had already scrounged a large piece of Hypalon from a discarded dinghy so that we could make patches. No, this is not two-part glue as suggested but it is made for Hypalon.
A normal repair goes like this. First inflate the dinghy to its rated pressure of between 2 or 3 pounds per square inch. Once the dinghy is hard and firm start soaping the outside. This allows you see the leaks as they will form bubbles that can be easily spotted. Take careful notes as to where the leak was found and mark them with a PENCIL (not indelible marker). Find every leak, as there are normally more than one. Cut out a piece of patch material that will extend 1.5” past the extent of the leak. Mark the area the patch will cover with a pencil and sand the surface smooth. Sand the side of the patch to be glued in the same manor. Clean the whole area with Toluene. If you can’t get Toluene then Acetone will work. Don’t use paint thinner as it has oils in it and that is what you are trying to remove with this cleaning process.

The leaky spot was pretty easy to find. You can see that the tube has
chafed where the painter has rubbed on it while we’ve been underway.
Now comes a special trick. Leave the dinghy deflated. Cut a second small patch that just covers the leak. The second patch should be about ¾” in diameter for a small hole. Sand and clean the patch as stated above. Using super glue, apply the small patch over the leak. Patch all the leaks with this super glue trick, then let the glue dry for a half hour. Carefully clean any left over super glue with Acetone. The edges of the patch and area should be clean of all residual super glue.
Inflate the dinghy back to pressure. Now it’s time to use the high tech two-part glue to patch over the holes and the small patches. Pressure helps set the glue, and the leaks already held by the super glue allow you to fix all the leaks at once and use the dinghy almost immediately.

All done. If you look closely you can kind of see the two smaller patches under the larger patch.
Here are a few tricks that will help you start your new business. A hot air gun or hair dryer will loosen old patches or open seems if the need arises. Be careful and don’t over heat. A disk grinder, die grinder, or Dremel tool with 180-220 paper can be used to sand the fabric, but this is for the patch side, or real pro’s. A disk grinder can easily cut deeper than you intended, but the pros often use them. Hand sand with 120 grit sandpaper. If you find that glue just will not stick it may be that at some point in the dinghy’s history someone has used Armor All to clean and protect the dinghy. If Armor All was applied just once glue will never again stick to the Hypalon. You may be able to break the residual Armor All by mixing up a slurry of Tide soap and dishwashing soap. Paint the slurry over the area to be patched and let sit. Remove and rinse completely. Clean with Toluene or Acetone and try the glue again. Shop vacuums can suck a dinghy down for fast and easy packing. The pressure side of a shop vacuum will fill a dinghy almost all the way leaving just a few pumps needed to top off the hardness. Patch dingy floors on the inside instead of the outside. That way the rushing water will not try to tear you patch away.
Excellent thank-you.
I have done many such repairs but I have never heard, or thought, of putting a small inner patch on first. And I certainly would not have thought of using superglue for it. Sounds good.
Cheers!
Mike
It seems to be holding air. Time will tell.
Could you fill the “inflatable” area with some of the expanding foam like “great stuff” and make it a semi solid core yet bouyant and still relatively light? Sort of like a Boston Whaler in a semi rigid state? Or! Cut the stern of one side of the fabric open and stuff it full of those swimming noodles!
Of course if you did that you’d have to seal it with Duck Tape, and then well you’re just starting to look like boat bums…course, it might deter theft even more….
hehe… or we could just try not to puncture it. That might be easier. 🙂
There are a few larger (6 to 10 m) RIBs around that have foam-filled collars. It’s rather pricey but works very well.
I’ll admit to having a preference for aluminum skiffs over inflatable ones (ours up north has been dragged over docks and rocks for 30+ years with no repairs, and is still in good shape). But good luck finding a place for such a skiff on your average sailboat….
Many people do use hard tenders. As you know, they are definitely not the norm though.
I think it was “How to make Money with Boats” pg 237
http://tinyurl.com/ag2jlzl
Greg
Thanks. I just emailed the author.
Have you seen the price of the book? £75 !!!!!!
Well, I suppose that is one way to make money out of boats.
Mike
Not sure where you saw that but the Kindle price as linked in our post is 10 bucks.
I’ve used the double patch but not with super glue and not reinflating for the second. Great info! Hope you got those edges good.
Me too.
rebecca & mike
great website /blog – well written clear and very very informative – just got my “blue water sailing ” mag from the P O box – the one with Amanda on the front cover ( have done two Pacific legs with John & Amanda – wot an experience – great people) and there u are with an article – how fantastic – a credit to you both – enjoy reading your blog every day – ps happy australia day
Hi Stewart
Thanks for the nice comment. I’m going to need to find myself a copy of that magazine. We have yet to see the article ourselves. 🙂